
编译OpenJDK 17
编译JDK
在 Linux 下编译还是很容易的,环境配置好就行了,在 windows 下编译就好多坑了,之前在 windows 编译 16 失败过,怎么也找不到原因,最近抽时间重新折腾了一番,终于成功了。
前置条件:要编译最新JDK,需要上一版本的JDK。例如JDK17需要JDK16作为环境。
Linux
编译系统版本
██████████████████  ████████   root@devlgq-linux
██████████████████  ████████   -----------------
██████████████████  ████████   OS: Manjaro Linux x86_64
██████████████████  ████████   Host: MS-7B23 1.0
████████            ████████   Kernel: 5.9.16-1-MANJARO
████████  ████████  ████████   Uptime: 14 days, 21 hours, 29 mins
████████  ████████  ████████   Packages: 1327 (pacman)
████████  ████████  ████████   Shell: zsh 5.8
████████  ████████  ████████   Terminal: /dev/pts/0
████████  ████████  ████████   CPU: Intel i5-8500 (6) @ 4.100GHz
████████  ████████  ████████   GPU: AMD ATI Radeon RX 550 640SP / RX 560/560X
████████  ████████  ████████   Memory: 1153MiB / 32051MiB
████████  ████████  ████████
████████  ████████  ████████
拉取源码
git clone https://github.com/openjdk/jdk.git
# 查看当前tag
git describe --tags

jdk-17+23-47-g4d26f22b9ad

# 查询tag,比如:想编译jdk17
git tag -l "jdk-17*"
# 切换tag
git checkout jdk-17+20
配置环境
# 安装 gcc 和 clang
sudo pacman -S gcc clang
# 安装 FreeType
sudo pacman -S freetype2
# 安装 CPUS
sudo pacman -S cpus
# 安装 X11
sudo pacman -S libxtst libxt libxrender libxrandr libxi
# 安装 alsa
sudo pacman -S alsa-lib
# 安装 libffi
sudo pacman -S libffi
# 安装 autoconf
sudo pacman -S autoconf
# 安装 make
sudo pacman -S make
# 安装 unzip
sudo pacman -S unzip zip
# 实际 manjaro 已经安装了大部分的依赖了的
编译
# running configure
./configure --with-boot-jdk="/root/Documents/jdk-16.0.1+9"
====================================================
The existing configuration has been successfully updated in
/root/Documents/jdk/build/linux-x86_64-server-release
using configure arguments '--with-boot-jdk=/root/Documents/jdk-16.0.1+9'.

Configuration summary:
* Name:           linux-x86_64-server-release
* Debug level:    release
* HS debug level: product
* JVM variants:   server
* JVM features:   server: 'cds compiler1 compiler2 epsilongc g1gc jfr jni-check jvmci jvmti management nmt parallelgc serialgc services shenandoahgc vm-structs zgc'
* OpenJDK target: OS: linux, CPU architecture: x86, address length: 64
* Version string: 17-internal+0-adhoc.root.jdk (17-internal)

Tools summary:
* Boot JDK:       openjdk version "16.0.1" 2021-04-20 OpenJDK Runtime Environment AdoptOpenJDK-16.0.1+9 (build 16.0.1+9) OpenJDK 64-Bit Server VM AdoptOpenJDK-16.0.1+9 (build 16.0.1+9, mixed mode, sharing) (at /root/Documents/jdk-16.0.1+9)
* Toolchain:      gcc (GNU Compiler Collection)
* C Compiler:     Version 10.2.0 (at /usr/bin/gcc)
* C++ Compiler:   Version 10.2.0 (at /usr/bin/g++)

Build performance summary:
* Cores to use:   6
* Memory limit:   32051 MB
有以上信息说明配置成功。
开始编译
# 编译jdk镜像
make images
编译完成, 大约编译了6分钟.
Compiling 1 files for CLASSLIST_JAR
Creating support/demos/image/jfc/Notepad/Notepad.jar
Creating support/demos/image/jfc/Stylepad/Stylepad.jar
Creating support/demos/image/jfc/SampleTree/SampleTree.jar
Creating support/demos/image/jfc/TableExample/TableExample.jar
Creating support/demos/image/jfc/TransparentRuler/TransparentRuler.jar
Creating support/classlist.jar
Creating jdk.jlink.jmod
Creating java.base.jmod
Creating jdk image
Creating CDS archive for jdk image
Creating CDS-NOCOOPS archive for jdk image
Stopping sjavac server
Finished building target 'images' in configuration 'linux-x86_64-server-release'
简单测试
# 进入编译目录
cd /home/devlgq/development/jdk/build/linux-x86_64-server-release/jdk/bin
./java -version
openjdk version "17-internal" 2021-09-14
OpenJDK Runtime Environment (build 17-internal+0-adhoc.root.jdk)
OpenJDK 64-Bit Server VM (build 17-internal+0-adhoc.root.jdk, mixed mode)
./jshell
|  Welcome to JShell -- Version 17-internal
|  For an introduction type: /help intro

jshell>
Windows
编译系统版本
版本 Windows 10 专业版
版本号 21H1
安装日期 2020-06-05
操作系统内部版本 19043.985
体验 Windows Feature Experience Pack 120.2212.2020.0
基于Cygwin
Cygwin 环境搭建
需要注意的是源码应该通过 Cygwin bash shell 进行clone,确保源码文件都具备 Cygwin 的属性,而不是通过Windows的Explorer进行clone的,否则会出现很多奇怪的问题。
需要的依赖:
- autoconf
- make
- zip
- unzip
# 由于之前就安装Cygwin了, 所以这里安装下缺失的依赖
.\setup-x86_64.exe -q -P autoconf -P make -P unzip -P zip
# 注意, 如果是使用 windows 的git, 执行以下命令
git config --global core.autocrlf false
# 拉取源码
git clone https://github.com/openjdk/jdk.git
# 切换成要编译jdk的版本 这里选jdk17
git tag -l
git checkout jdk17+35
# 确认下
git describe --tags
编译 FreeType
可以从github下载别人编译好的.
https://github.com/ubawurinna/freetype-windows-binaries
这边我自己下载源码进行编译.
https://www.freetype.org/developer.html
基于 vs2019 编译 freetype。
在目录下builds\windows\vc2010\,打开freetype.sln解决方案。设置解决方案配置为Release,解决方案平台为x64。
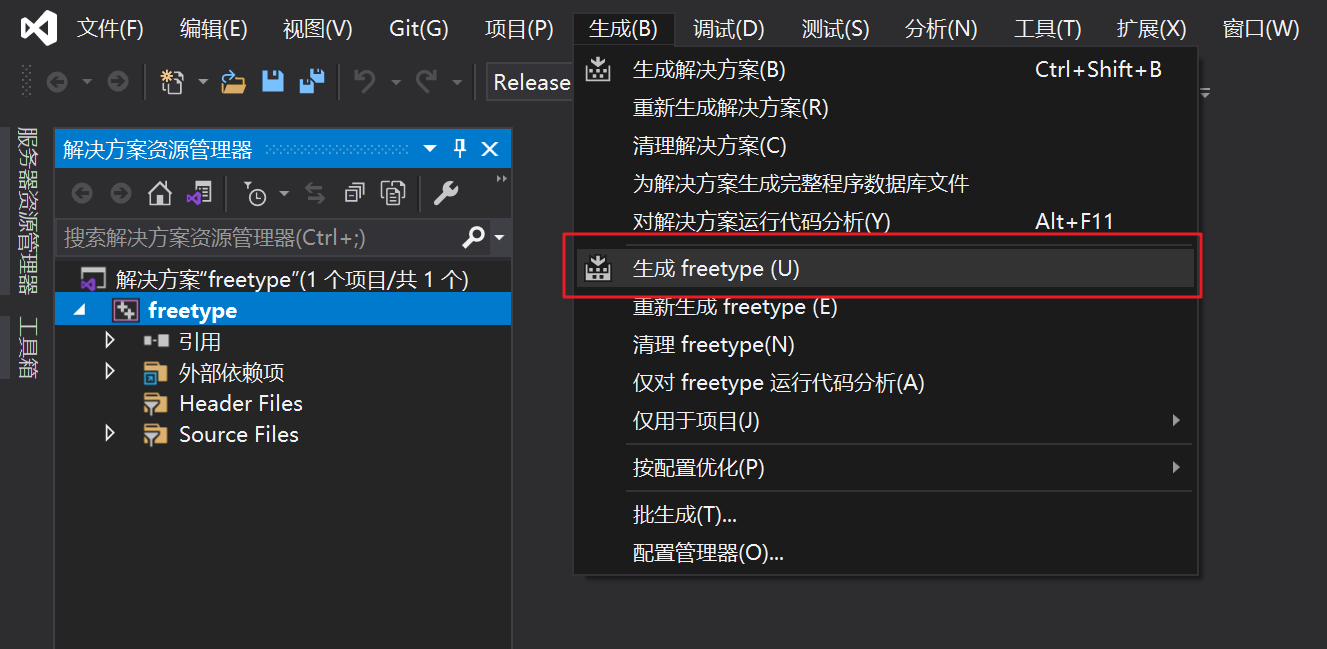
编译完成后,生成位置在 objs/x64/Release/freetype.dll 和 objs/x64/Release/freetype.lib。
修改相关脚本
/make/autoconf/toolchain.m4。该脚本在对 vs 版本字符串进行切割获取架构位数的时候,会有切割不对,获取不到正确架构位数的问题,直接修改下。
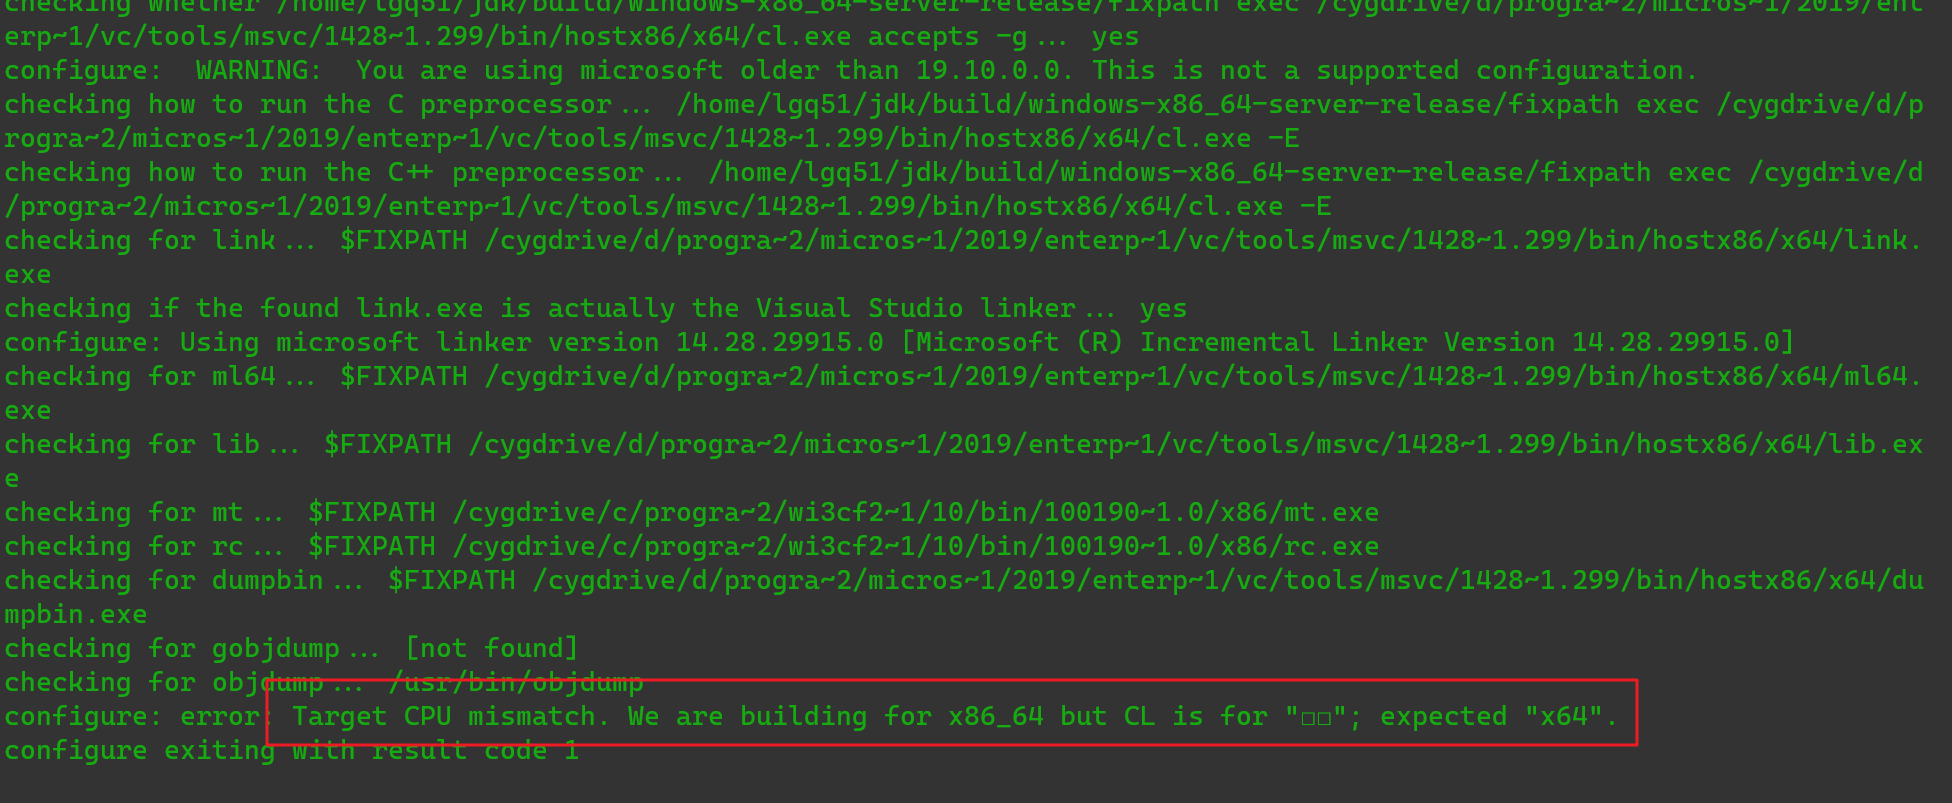
# 原来是下面那一句的, 现在修改为下面
# COMPILER_CPU_TEST=`$ECHO $CC_VERSION_OUTPUT | $SED -n "s/^.* \(.*\)$/\1/p"`
# 本来用下面这个的, 但是不知道为什么切割不了...所以后面直接写死 x64 了
# COMPILER_CPU_TEST=`$ECHO $CC_VERSION_OUTPUT | awk '{print $2}'`
COMPILER_CPU_TEST=x64
make/autoconf/lib-freetype.m4"。对于输入参数--with-freetype-lib和--with-freetype-include的判断有误。
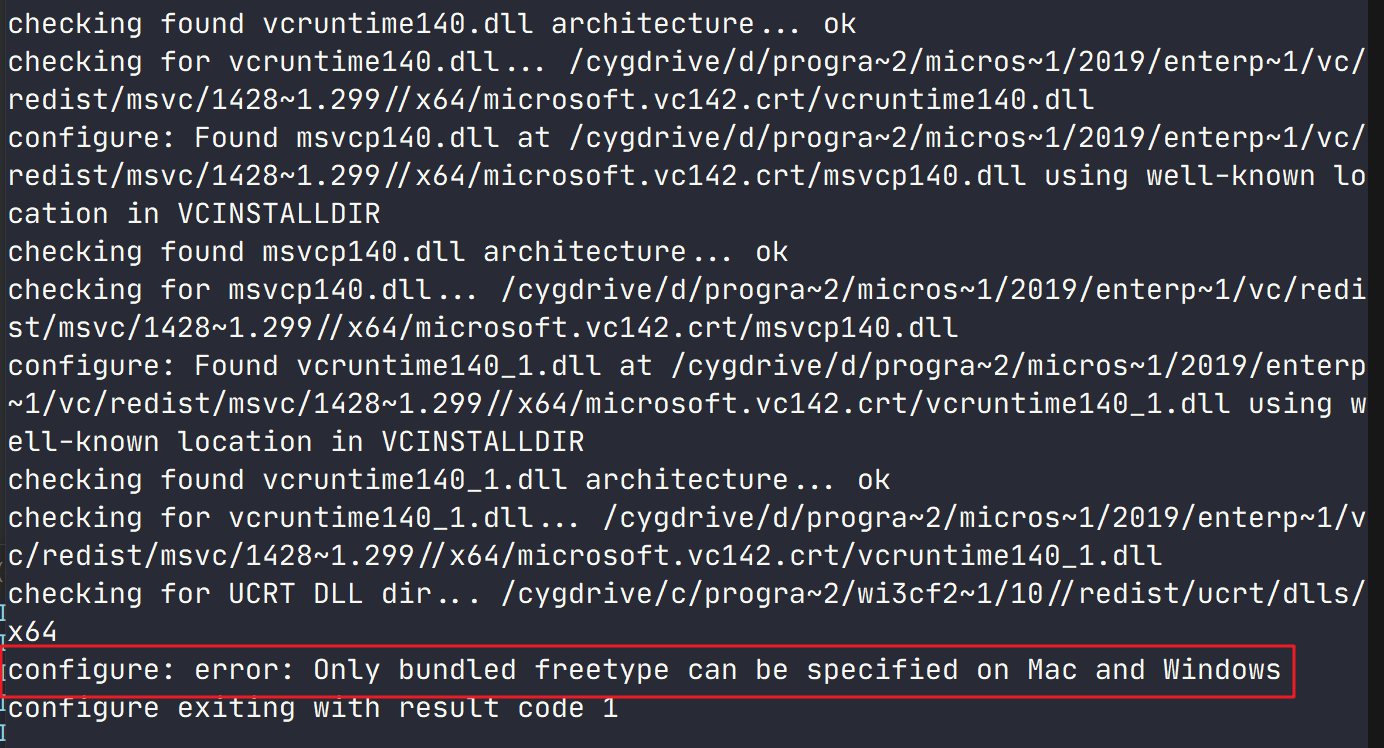
# 找到下面这一句, 直接注释掉 或者 把 AC_MSG_ERROR 改为 AC_MSG_RESULT
AC_MSG_ERROR([Only bundled freetype can be specified on Mac and Windows])
make/modules/java.desktop/lib/Awt2dLibraries.gmk. 这个脚本会导致freetype依赖找不到.
# 找到下面注释的这一句, 然后修改为 freetype 库的位置
# LIBFREETYPE_LIBS := $(FREETYPE_LIBS)
LIBFREETYPE_LIBS := /cygdrive/d/Tools/freetype/freetype.lib
编译
# 一些要注意的参数
--with-freetype-include # freetype 头文件
--with-freetype-lib # freetype 库
--with-boot-jdk # 上一版本的jdk位置
--disable-warnings-as-errors # 把warning当作error关掉
--with-jtreg # 配置测试框架的位置
--with-gtest # 配置谷歌测试框架位置
# 先进行配置
bash configure --with-freetype-include="/cygdrive/d/Tools/freetype/include" --with-freetype-lib="/cygdrive/d/Tools/freetype/" --with-boot-jdk="/cygdrive/d/SDK/JDK/jdk-16.0.2+7" --with-tools-dir="/cygdrive/d/Program Files (x86)/Microsoft Visual Studio/2019/Enterprise/VC/Auxiliary/Build" --disable-warnings-as-errors --with-jtreg="/cygdrive/d/Tools/jtreg" --with-version-opt="DevLGQ-17.0.0+35" --with-vendor-version-string="DevLGQ" --with-debug-level=fastdebug
出现以下就说明配置成功了。
The existing configuration has been successfully updated in
/home/lgq51/jdk/build/windows-x86_64-server-release
using configure arguments '--with-freetype-include=/cygdrive/d/Tools/freetype/include --with-freetype-lib=/cygdrive/d/Tools/freetype/ --with-boot-jdk='/cygdrive/d/Program Files/java/jdk-16' --with-tools-dir='/cygdrive/d/Program Files (x86)/Microsoft Visual Studio/2019/Enterprise/VC/Auxiliary/Build' --disable-warnings-as-errors --with-jtreg=/cygdrive/d/Tools/jtreg'.

Configuration summary:
* Name:           windows-x86_64-server-release
* Debug level:    release
* HS debug level: product
* JVM variants:   server
* JVM features:   server: 'cds compiler1 compiler2 epsilongc g1gc jfr jni-check jvmci jvmti management nmt parallelgc serialgc services shenandoahgc vm-structs zgc'
* OpenJDK target: OS: windows, CPU architecture: x86, address length: 64
* Version string: 17-internal+0-adhoc.lgq51.jdk (17-internal)

Tools summary:
* Environment:    cygwin version 3.2.0(0.340/5/3), 2021-03-29 08:42; windows version 10.0.19043.985; prefix "/cygdrive"; root "D:\cygwin64"
* Boot JDK:       openjdk version "16" 2021-03-16 OpenJDK Runtime Environment (build 16+36-2231) OpenJDK 64-Bit Server VM (build 16+36-2231, mixed mode, sharing) (at /cygdrive/d/progra~1/java/jdk-16)
* Toolchain:      microsoft (Microsoft Visual Studio 2019)
* C Compiler:     Version 用于 x64 的 Microsoft (R) C/C++ 优化编译器 19.28.29915 版 (at /cygdrive/d/progra~2/micros~1/2019/enterp~1/vc/tools/msvc/1428~1.299/bin/hostx86/x64/cl.exe)
* C++ Compiler:   Version 用于 x64 的 Microsoft (R) C/C++ 优化编译器 19.28.29915 版 (at /cygdrive/d/progra~2/micros~1/2019/enterp~1/vc/tools/msvc/1428~1.299/bin/hostx86/x64/cl.exe)

Build performance summary:
* Cores to use:   24
* Memory limit:   65457 MB
# 编译镜像
make images
我电脑24线程编译40分钟左右,这和在linux(6线程)下的编译也差太远了吧…
当出现下面这个时就编译完成了。
Creating support/demos/image/jfc/CodePointIM/CodePointIM.jar
Creating support/demos/image/jfc/FileChooserDemo/FileChooserDemo.jar
Creating support/demos/image/jfc/Font2DTest/Font2DTest.jar
Creating support/demos/image/jfc/SampleTree/SampleTree.jar
Creating support/demos/image/jfc/TransparentRuler/TransparentRuler.jar
Creating support/demos/image/jfc/Metalworks/Metalworks.jar
Creating support/demos/image/jfc/Notepad/Notepad.jar
Creating support/demos/image/jfc/TableExample/TableExample.jar
Creating support/demos/image/jfc/Stylepad/Stylepad.jar
Creating support/demos/image/jfc/SwingSet2/SwingSet2.jar
Creating support/demos/image/jfc/J2Ddemo/J2Ddemo.jar
Creating jdk image
Creating CDS archive for jdk image
Creating CDS-NOCOOPS archive for jdk image
Finished building target 'images' in configuration 'windows-x86_64-server-release'
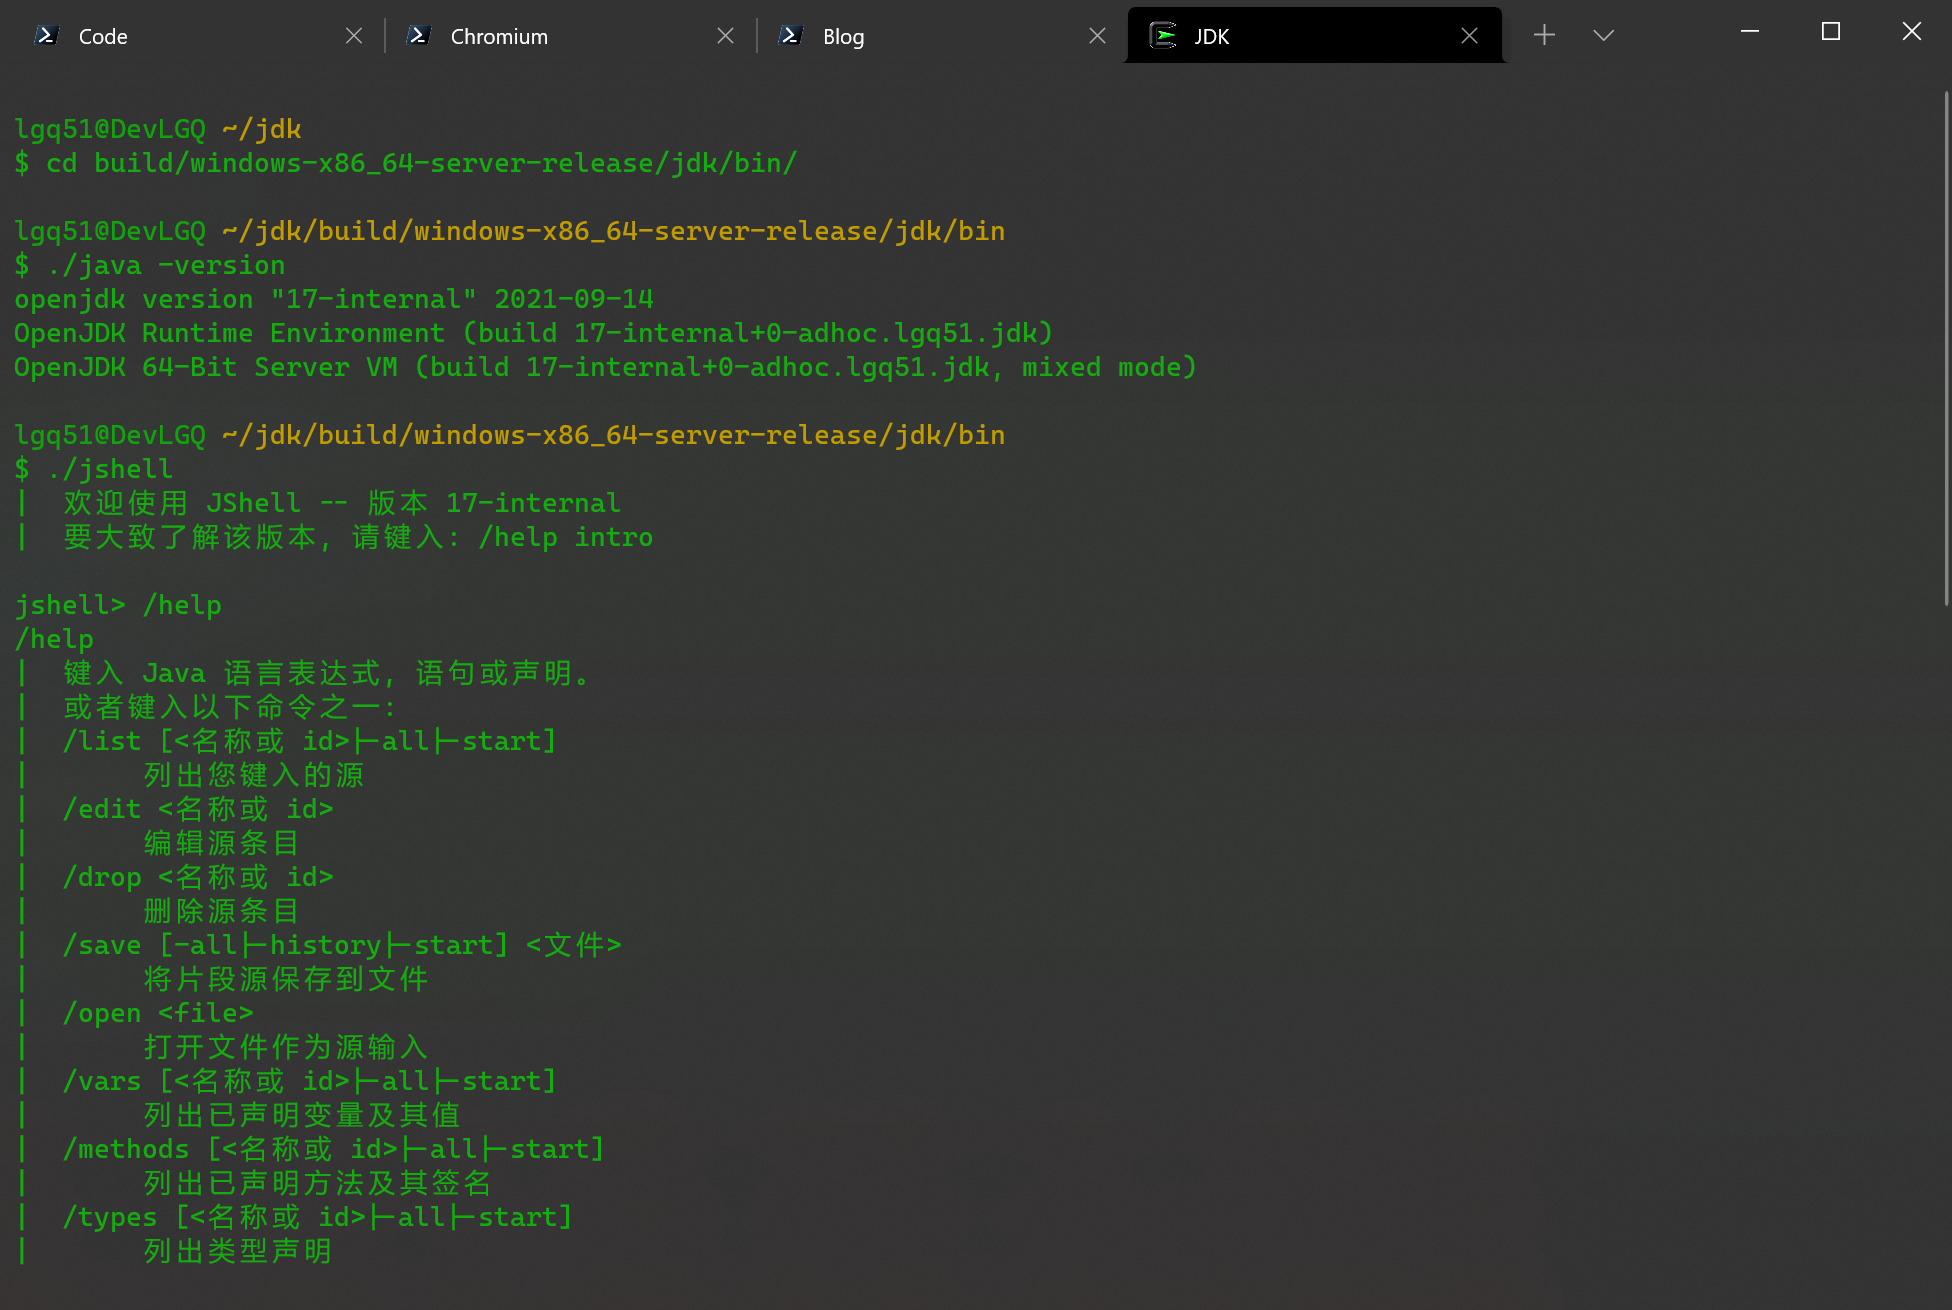
简单测试下。
cd /build/windows-x86_64-server-release/jdk/bin
./java -version

openjdk version "17-internal" 2021-09-14
OpenJDK Runtime Environment (build 17-internal+0-adhoc.lgq51.jdk)
OpenJDK 64-Bit Server VM (build 17-internal+0-adhoc.lgq51.jdk, mixed mode)
如果想要大范围测试,需要依赖 jtreg 框架或 gtest 框架, 然后执行下面指令, 注意需要跑很长时间。
make run-test-tier1
基于Msys2
# 安装依赖
pacman -S autoconf cmake gcc zip unzip make
# 使用 Msys2
./configure --with-boot-jdk="/d/SDK/JDK/jdk21" --with-tools-dir="/mnt/d/Programs/Microsoft Visual Studio/2022/Enterprise/VC/Auxiliary/Build" --disable-warnings-as-errors --with-jtreg="/mnt/d/Tools/jtreg" --with-version-opt="DevLGQ-21.0.0+31" --with-vendor-version-string="DevLGQ" --with-debug-level=fastdebug --with-jmod-compress=zip-1 --with-msvc-toolset-version="14.38.33130" --with-conf-name="windows-x86_64-server-fastdebug"

# 编译images,JOBS使用12核,根据需求进行修改
make JOBS=12 images
# 生成
make compile-commands
基于WSL
基于WSL的话,可以编译linux或者windows的jdk。
下载编译好的jtreg。
# 编译linux下的jdk
# 安装依赖
apt-get install libasound2-dev libcups2-dev libfontconfig1-dev libx11-dev libxext-dev libxrender-dev libxrandr-dev libxtst-dev libxt-dev cmake gdb autoconf file
# 配置googletest,这里使用 1.13.0 版本
# 通过 make/conf/github-actions.conf 配置文件可以知道使用的 googletest 版本,最好一致
./configure --enable-debug --with-jvm-variants=server --build=x86_64-unknown-linux-gnu --with-version-opt="DevLGQ-21.0.0+35" --with-vendor-version-string="DevLGQ" --with-gtest="/root/workspace/googletest-1.13.0" --with-jtreg="/root/workspace/jtreg"
# 编译images,JOBS使用6核,根据需求进行修改
make JOBS=6 images CONF=linux-x86_64-server-fastdebug
# 生成compile_commands.json
make compile-commands CONF=linux-x86_64-server-fastdebug


# 编译windows下的jdk
# 笔记本,里面参数根据自己的路径进行修改
./configure --with-boot-jdk="/mnt/c/SDK/JDK/jdk-20.0.2" --with-tools-dir="/mnt/c/Program Files/Microsoft Visual Studio/2022/Enterprise/VC/Auxiliary/Build" --disable-warnings-as-errors --with-jtreg="/mnt/d/Tools/jtreg" --with-version-opt="DevLGQ-21.0.0+31" --with-vendor-version-string="DevLGQ" --with-debug-level=fastdebug --with-jmod-compress=zip-1 --with-msvc-toolset-version="14.39.33519" --with-conf-name="windows-x86_64-server-fastdebug"

# 台式
./configure --with-boot-jdk="/mnt/d/SDK/JDK/jdk21" --with-tools-dir="/mnt/d/Programs/Microsoft Visual Studio/2022/Enterprise/VC/Auxiliary/Build" --disable-warnings-as-errors --with-jtreg="/mnt/d/Tools/jtreg" --with-version-opt="DevLGQ-21.0.0+31" --with-vendor-version-string="DevLGQ" --with-debug-level=fastdebug --with-jmod-compress=zip-1 --with-msvc-toolset-version="14.38.33130" --with-conf-name="windows-x86_64-server-fastdebug"

# 编译images,JOBS使用6核,根据需求进行修改
make JOBS=6 images CONF=windows-x86_64-server-fastdebug
# 生成
make compile-commands CONF=windows-x86_64-server-fastdebug

博客内容遵循 署名-非商业性使用-相同方式共享 4.0 国际 (CC BY-NC-SA 4.0) 协议
本文永久链接是:https://blog.lgq51233.xyz/2021/05/24/%E7%BC%96%E8%AF%91JDK/